About Creations Recipes Tutorials Photos Contact

Friday, May 27, 2011

Some things on hold

Lately I've been really hitting my photography hard lately, trying to really get it off the ground. So pretty much all my free time has been going to that.

I finished putting my website together:


I'm pretty excited about really getting things going. And on top of all this, I'm completely booked in June. INCLUDING flying to New York for a weekend to do a wedding. "Awkward Eye Photography goes NATIONAL!"

Any whoo.... I'm super pumped but I won't be able to spend as much time blogging as I'd like.

Tuesday, May 24, 2011

big thrifty score ")


{$1....oh yeah}
{AMAZING condition}
{boring}
{FABULOUS}

Monday, May 16, 2011

vol.2


I love origami cubes these are so beautiful. 

I love paper crafts they are my favorite!

I think paper flowers are so pretty.

Origami Stars from enanna on Vimeo.

Sunday, May 15, 2011

Current Fav

I have completely become addicted to this snack. Try it if you dare.


What you need:
Sweet Mini Peppers (or just regular red, yellow, and orange peppers)
Whipped Cream Cheese
Salt

What you do:
Using a paring knife, cut the stem portion out of the pepper (or if using regular peppers, cut out the stem and seeds and slice into strips) You can also cut the peppers in half.

Sprinkle a bit of salt on to the pepper.

Spread some cream cheese love. Then eat till your heart's content.

Such a yummy snack and super refreshing. And I'm sure it's not to terribly unhealthy.

Saturday, May 14, 2011

{Project Restyle}


It's always fun to find old things and repurpose them to make them feel new. Inspired by Elsie of A Beautiful Mess, I have been trying to go green, in a sense, by doing just that. So here is my latest "Project Restyle"

I found this spice rack while thrifting for $2. It was in pretty bad shape, but I was super pumped about all the glass bottles that it came with. First I took it all apart and cleaned it up. Then sprayed it with a nice fresh coat of white paint. I nailed it all back together also using carpenter's adhesive to hold the joints better, since the nails just slipped right out.

I cleaned up the bottles then filled them with fresh herbs from my Dad's garden. There's basil, thyme, rosemary, mint, oregano, sage, and parsley. Yum! Added a few flowers for that special touch and VOIOLA! Brand new pretty thing I can hang in my kitchen above my sink. I love how a fresh coat of paint can do that ")

Fun with my little ones

I love warm days outside with my babies.


On a side note: Jocelyn's hair is finally just long enough that I can force it into tiny pigtails. I told myself I wouldn't ever do this cause I've always thought it looked a bit silly but I couldn't help myself.

Monday, May 9, 2011

vol.1


Beautiful, Comfy Looking Chair From Urban Outfitter's

Fun Fantasy Bed from Anthropologie

I love the colors of this tea pot. SO. CUTE.

I've lately fallen in love with tiny dinosaurs, I kinda started a collection, unofficially. I think I would like to make it official though. Might be a weird collection but I really like them.

Oh Man! I would LOVE to have this eye shadow palette

How awesome is this necklace!!!

It's my DREAM to one day have my own home library. I love the dark colors and the coziness of this room. **one day**

Saturday, May 7, 2011

How to Create Your Own Navigation Bar Tutorial


Navigation Bars, everyone has one. This took me FOR-EV-ER to figure out. And thanks to my lovely friend Talia, I finally got it. And I thought I would share how to make this, to help those who would like to further customize their blog. But can't figure things out.

I've never used any other blogging site other than Blogger, but I figure it's all pretty much then same.

First things is first. You need some sort of editing software. I always use Photoshop CS5 but I understand not everyone has it on their computer. There ia a free program you can download and it works just fine. It's called Gimp.


So I will have examples of both Gimp and Photoshop. To help walk you through it.

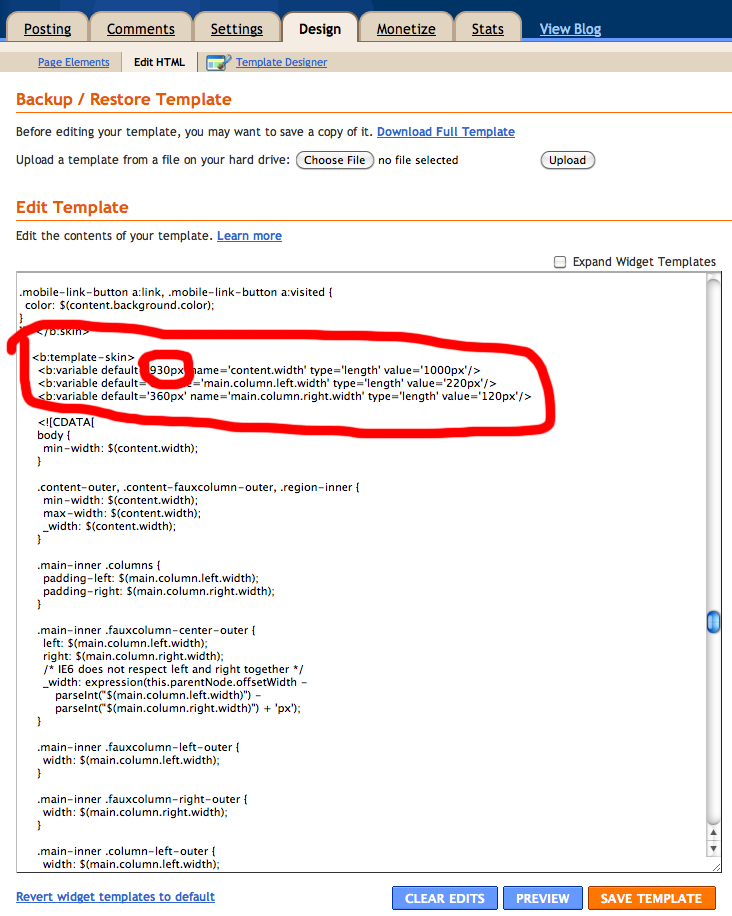
OKay, now you need to find out how wide to make your navigation bar. Go the the edit html tab, and you will need to find


Then find the number highlighted above. This is the number you will want to use when creating your navigation bar image.

Now we create the image you will use as your navigation bar.
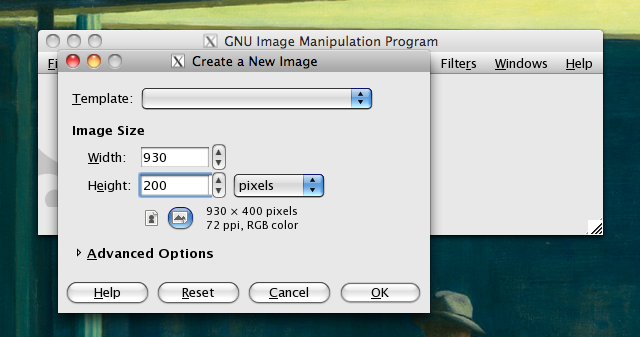
Create New image in GIMP
OR
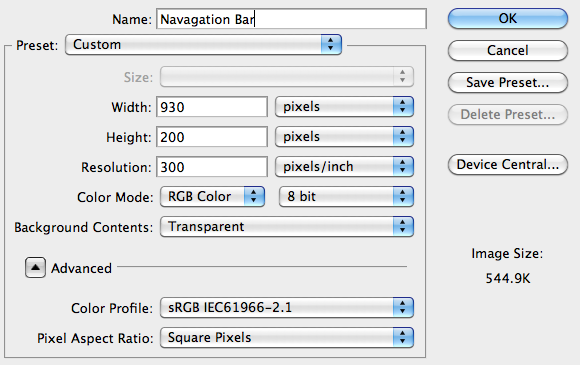
Create New Image in Photoshop
Now Design your image how ever you want. It can literally be, however you want. Just as long as you keep it at the correct width. It can be as fancy or as simple as you want. (Side note: if you want ANY part to be transparent, be sure to save your image as a .png

BTW I also go to dafont.com to find all my fonts. I LOVE this website for fonts. Especially because I'm obsessed with fonts.
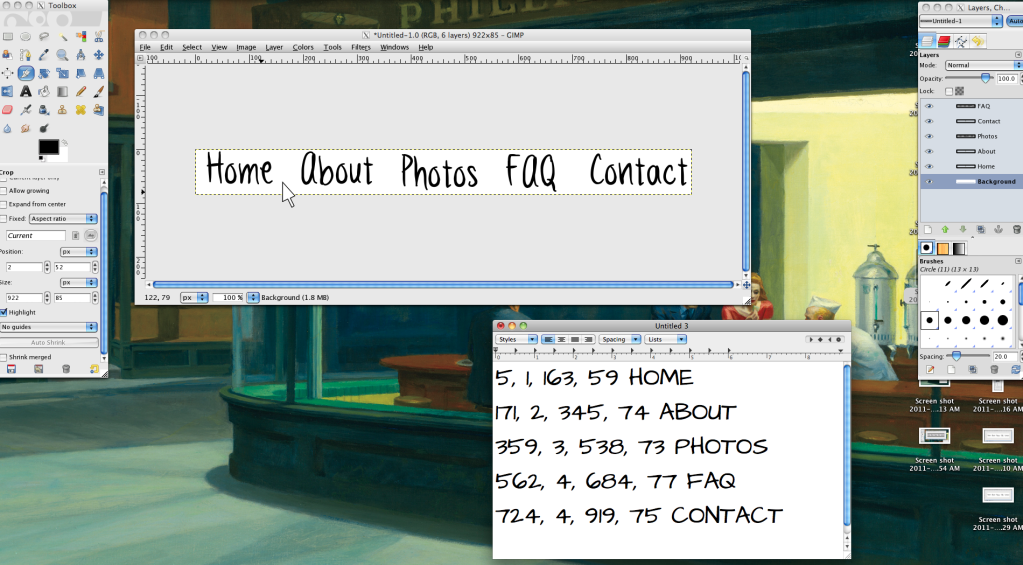
Once your image is created and you are fully satisfied. You will need to get the x and y coordinates to create your image map. Which means making part of the image clickable, to go to a link.
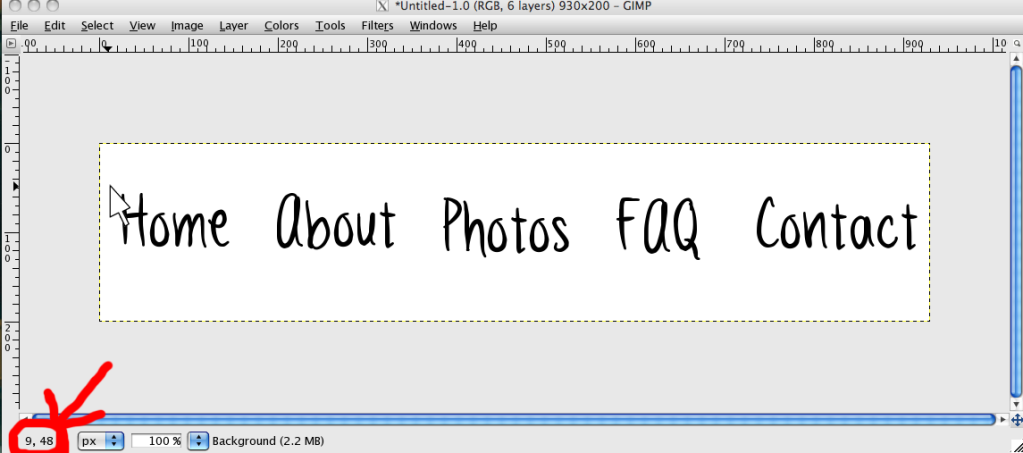
GIMP: Hover over the top left corner of the space you want to make the  "clickable" link.

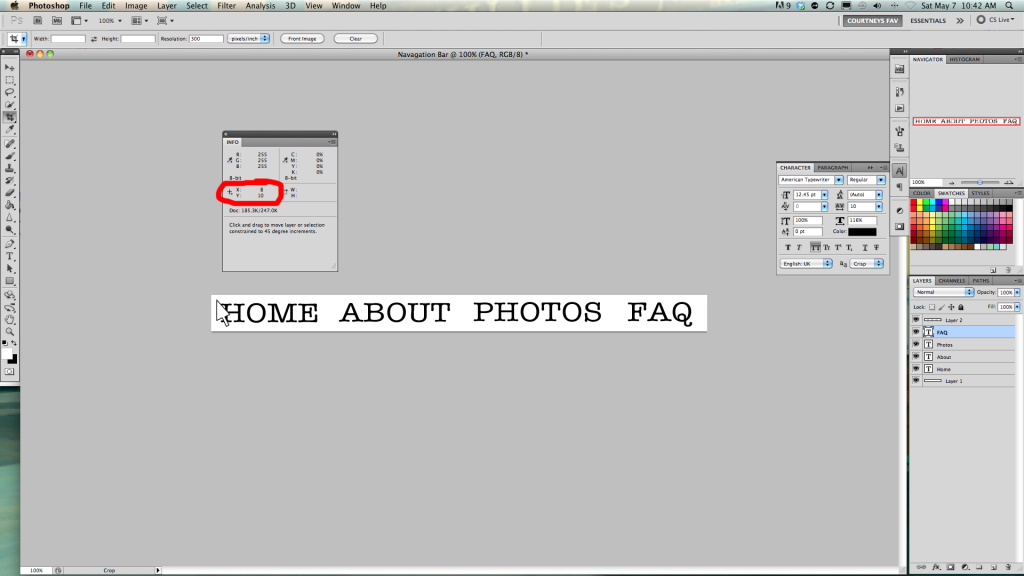
Photoshop: Hover over the top left corner of the space you want to make the  "clickable" link.
Now do the same for the LOWER RIGHT hand corner of the area you want "clickable"
You will want to make note of all your coordinates. Then save your image and upload it somewhere online that will not resize the image. Then you will need to obtain the image address.


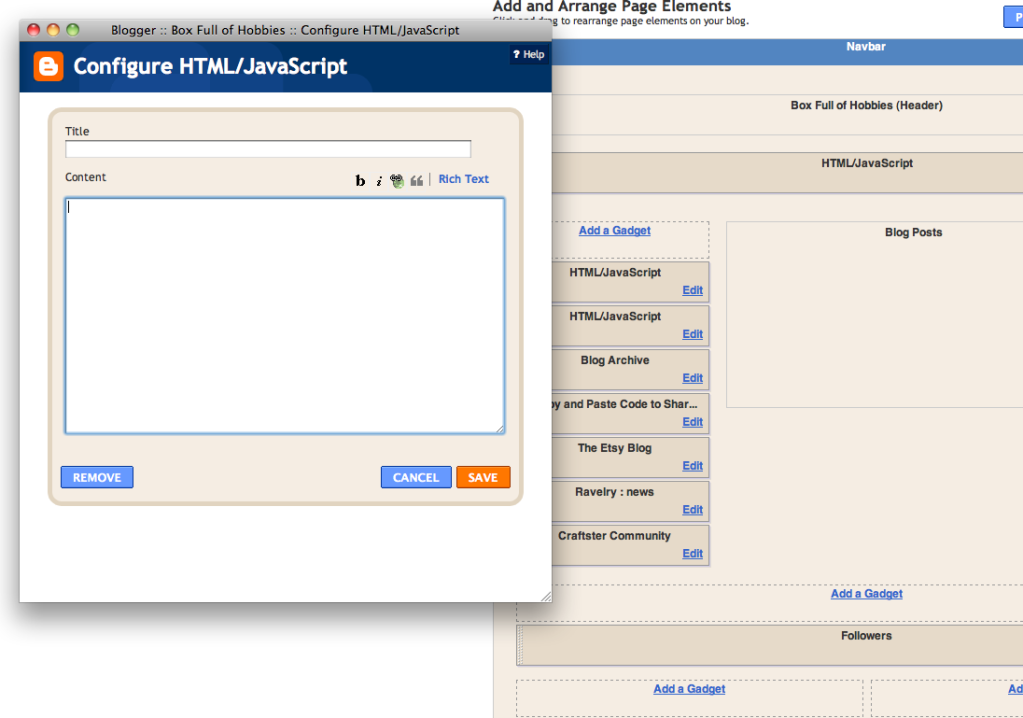
You will need to add a HTML/Java Script Gadget to the top of your page.
And paste the following code:
Of course the above is just an example using the coordinates from the GIMP example, you will want to replace all the information to be customized to your coordinates and blog.

(Side Note: if you want your link to open in a new tab just add: target="blank" right after the end quotes of the URL. See the "CONTACT" link above for an example)


And that's all. Hit save and you're done!

If you have any problems or questions please feel free to contact me and I would love to help you figure things out.